
1. Getting access
Ask the platform operator to share the admin spreadsheet with your own work Google account. Everything below happens inside that one spreadsheet — there is no separate admin website. When the sheet opens you'll see two custom menus in the menu bar, SOC Admin (day-to-day staff actions) and SOC Setup (operator territory — see the advanced section).
The first time you run a menu action, Google asks you to authorize the spreadsheet's script for your account — that's expected; follow the prompts once and it won't ask again.
The link only opens for Google accounts the sheet has been shared with — anyone else hits Google's permission screen. If that's you, ask the operator for access rather than using "Request access".
2. The Mobilizers tab
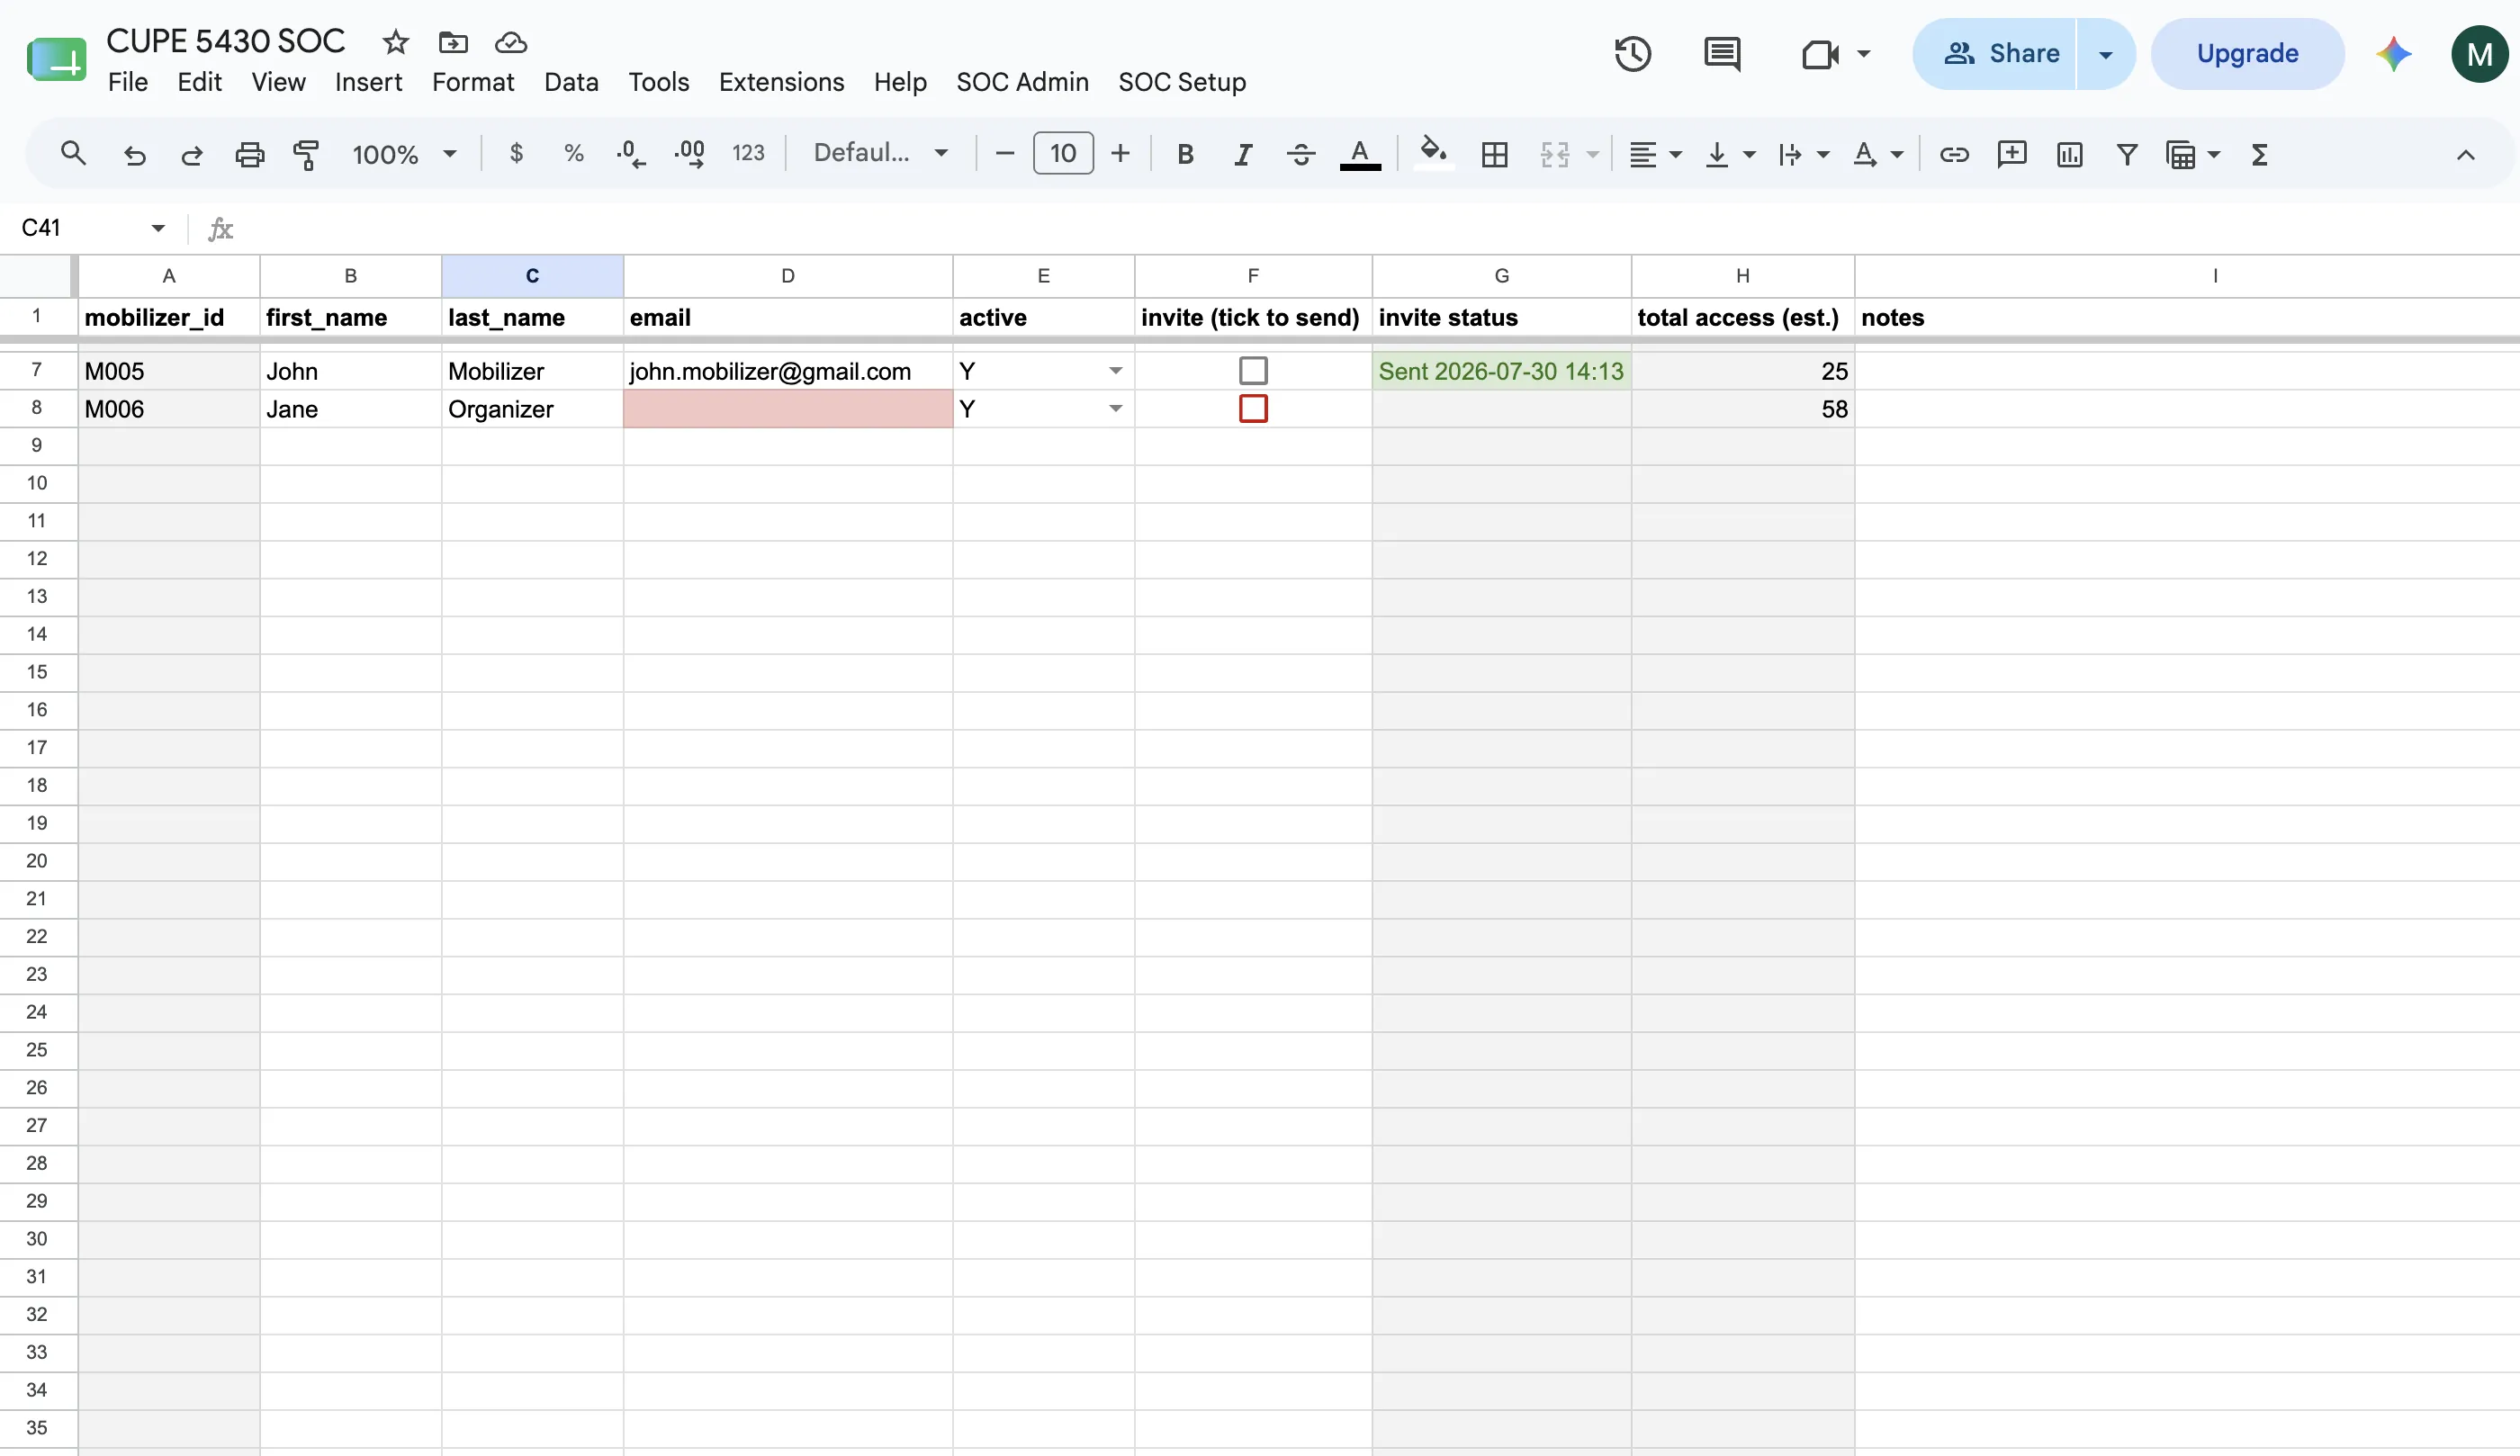
One row per mobilizer. To add someone, type their first name, last name, and email on a fresh row — the sheet fills in the rest on its own within a moment: a permanent Mobilizer ID (M-number), active set to Y, and an invite checkbox.
- email — the address their sign-in links go to. The cell flags red when it's missing or doesn't look like an email; invites can't send without one.
- active — Y/N. Set to N to park someone without deleting their row (they keep their history; they just can't sign in — see also revoking access).
- invite (tick to send) — the checkbox that sends their sign-in email. Just tick it: the send happens on its own within a moment or two — the box unticks itself and the invite status cell beside it turns green with "Sent" and the date. If a send fails, the box stays ticked and the status turns red with the reason — fix the cause (usually the email address), then untick and re-tick to retry.
- Inviting several people at once: select their invite checkboxes down the column and press Space — every selected row sends and stamps its own status. No menus needed.
- total access (est.) — a computed estimate of how many members this mobilizer's turf covers (grey = the sheet maintains it; don't type in it).
- notes — yours; the system ignores it.
Google limits how much mail a spreadsheet can send per day, so very large invite batches may need to be spread across a couple of days.
3. The Assignments tab: granting turf
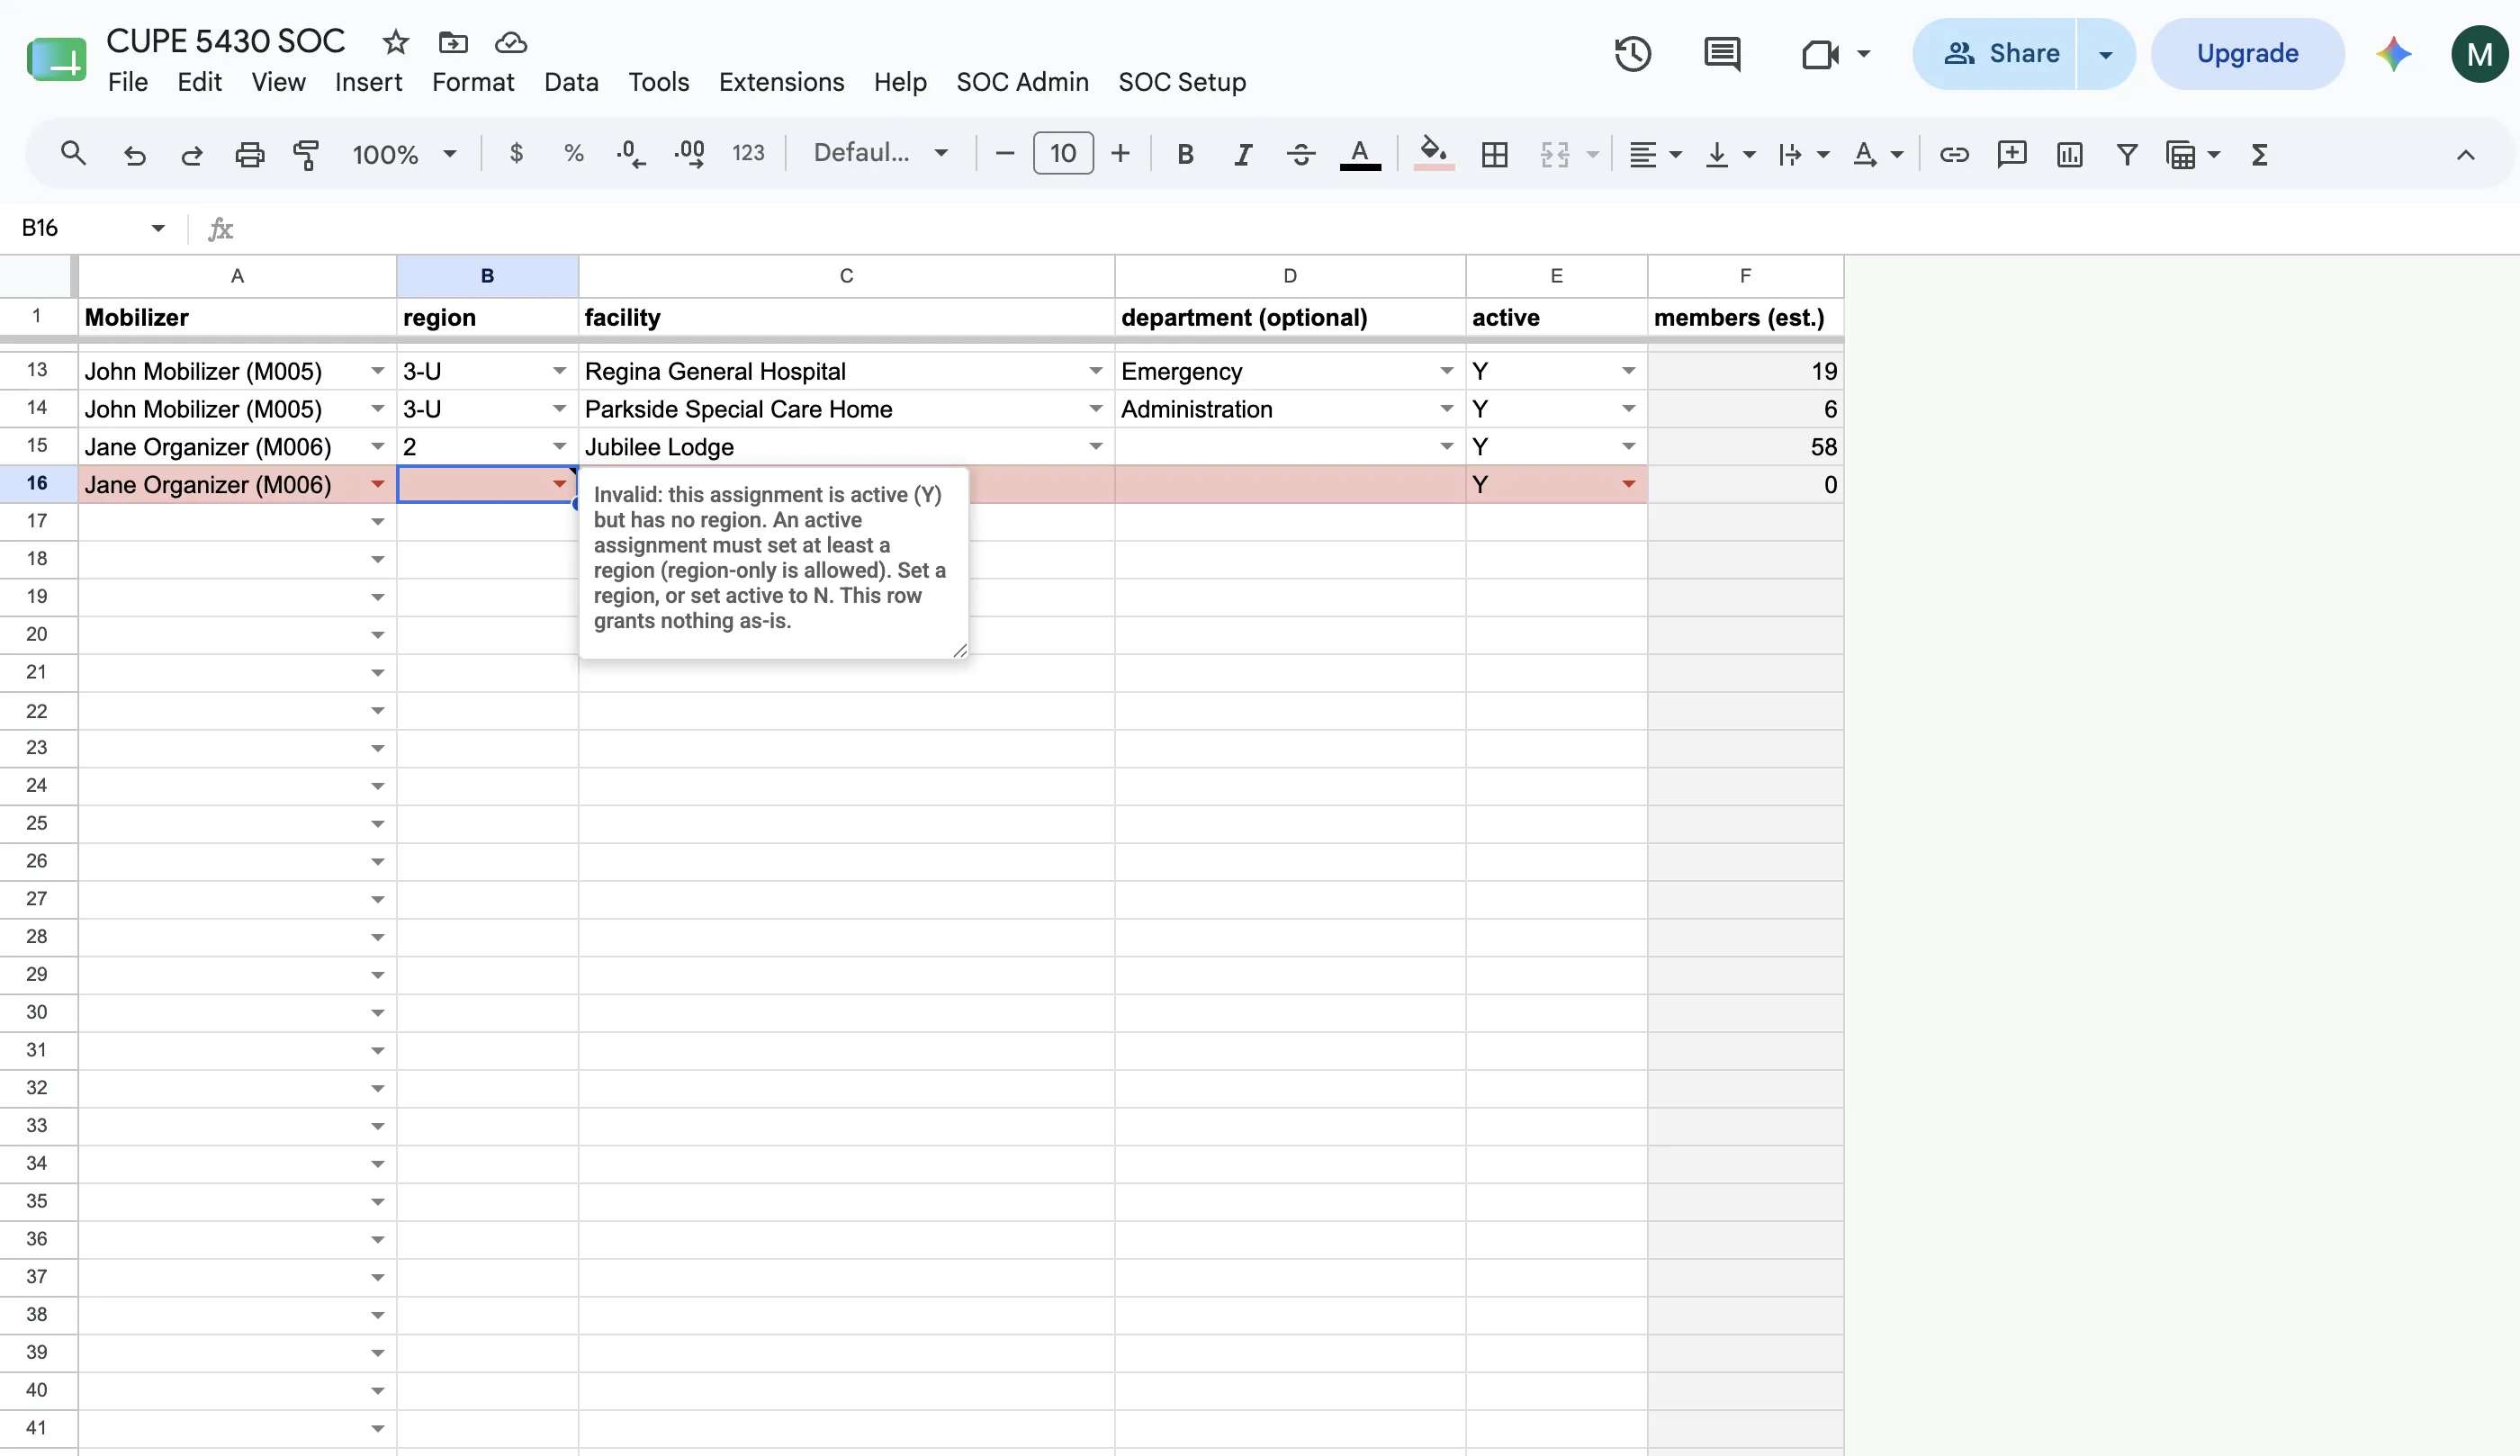
One row per grant: pick the Mobilizer from the dropdown, then fill in where they're mobilizing. The three place columns give three kinds of grant:
- Region-wide: region filled, facility left blank — every facility in the region, and the app offers them "All Sites".
- Facility: region + facility — that whole facility, all departments.
- Department: region + facility + department — just that department.
A mobilizer can hold several rows (several facilities, several departments — whatever the assignment calls for), and their app's Settings will offer exactly the levels their rows grant. active works like the Mobilizers one: N switches a grant off without deleting it.
- A row flags red when its pieces don't fit together — a facility that isn't in that region, a department that facility doesn't have, or a name typed with a typo. A red row grants nothing until fixed, so treat red as "this mobilizer can't see what you think they can".
- members (est.) is computed (grey — don't edit): how many members that row currently reaches.
- Rows drift out of order as you add them — run SOC Admin → Sort Mobilizers & Assignments any time to tidy both tabs. Don't drag-sort by hand.
4. The SOC Admin menu
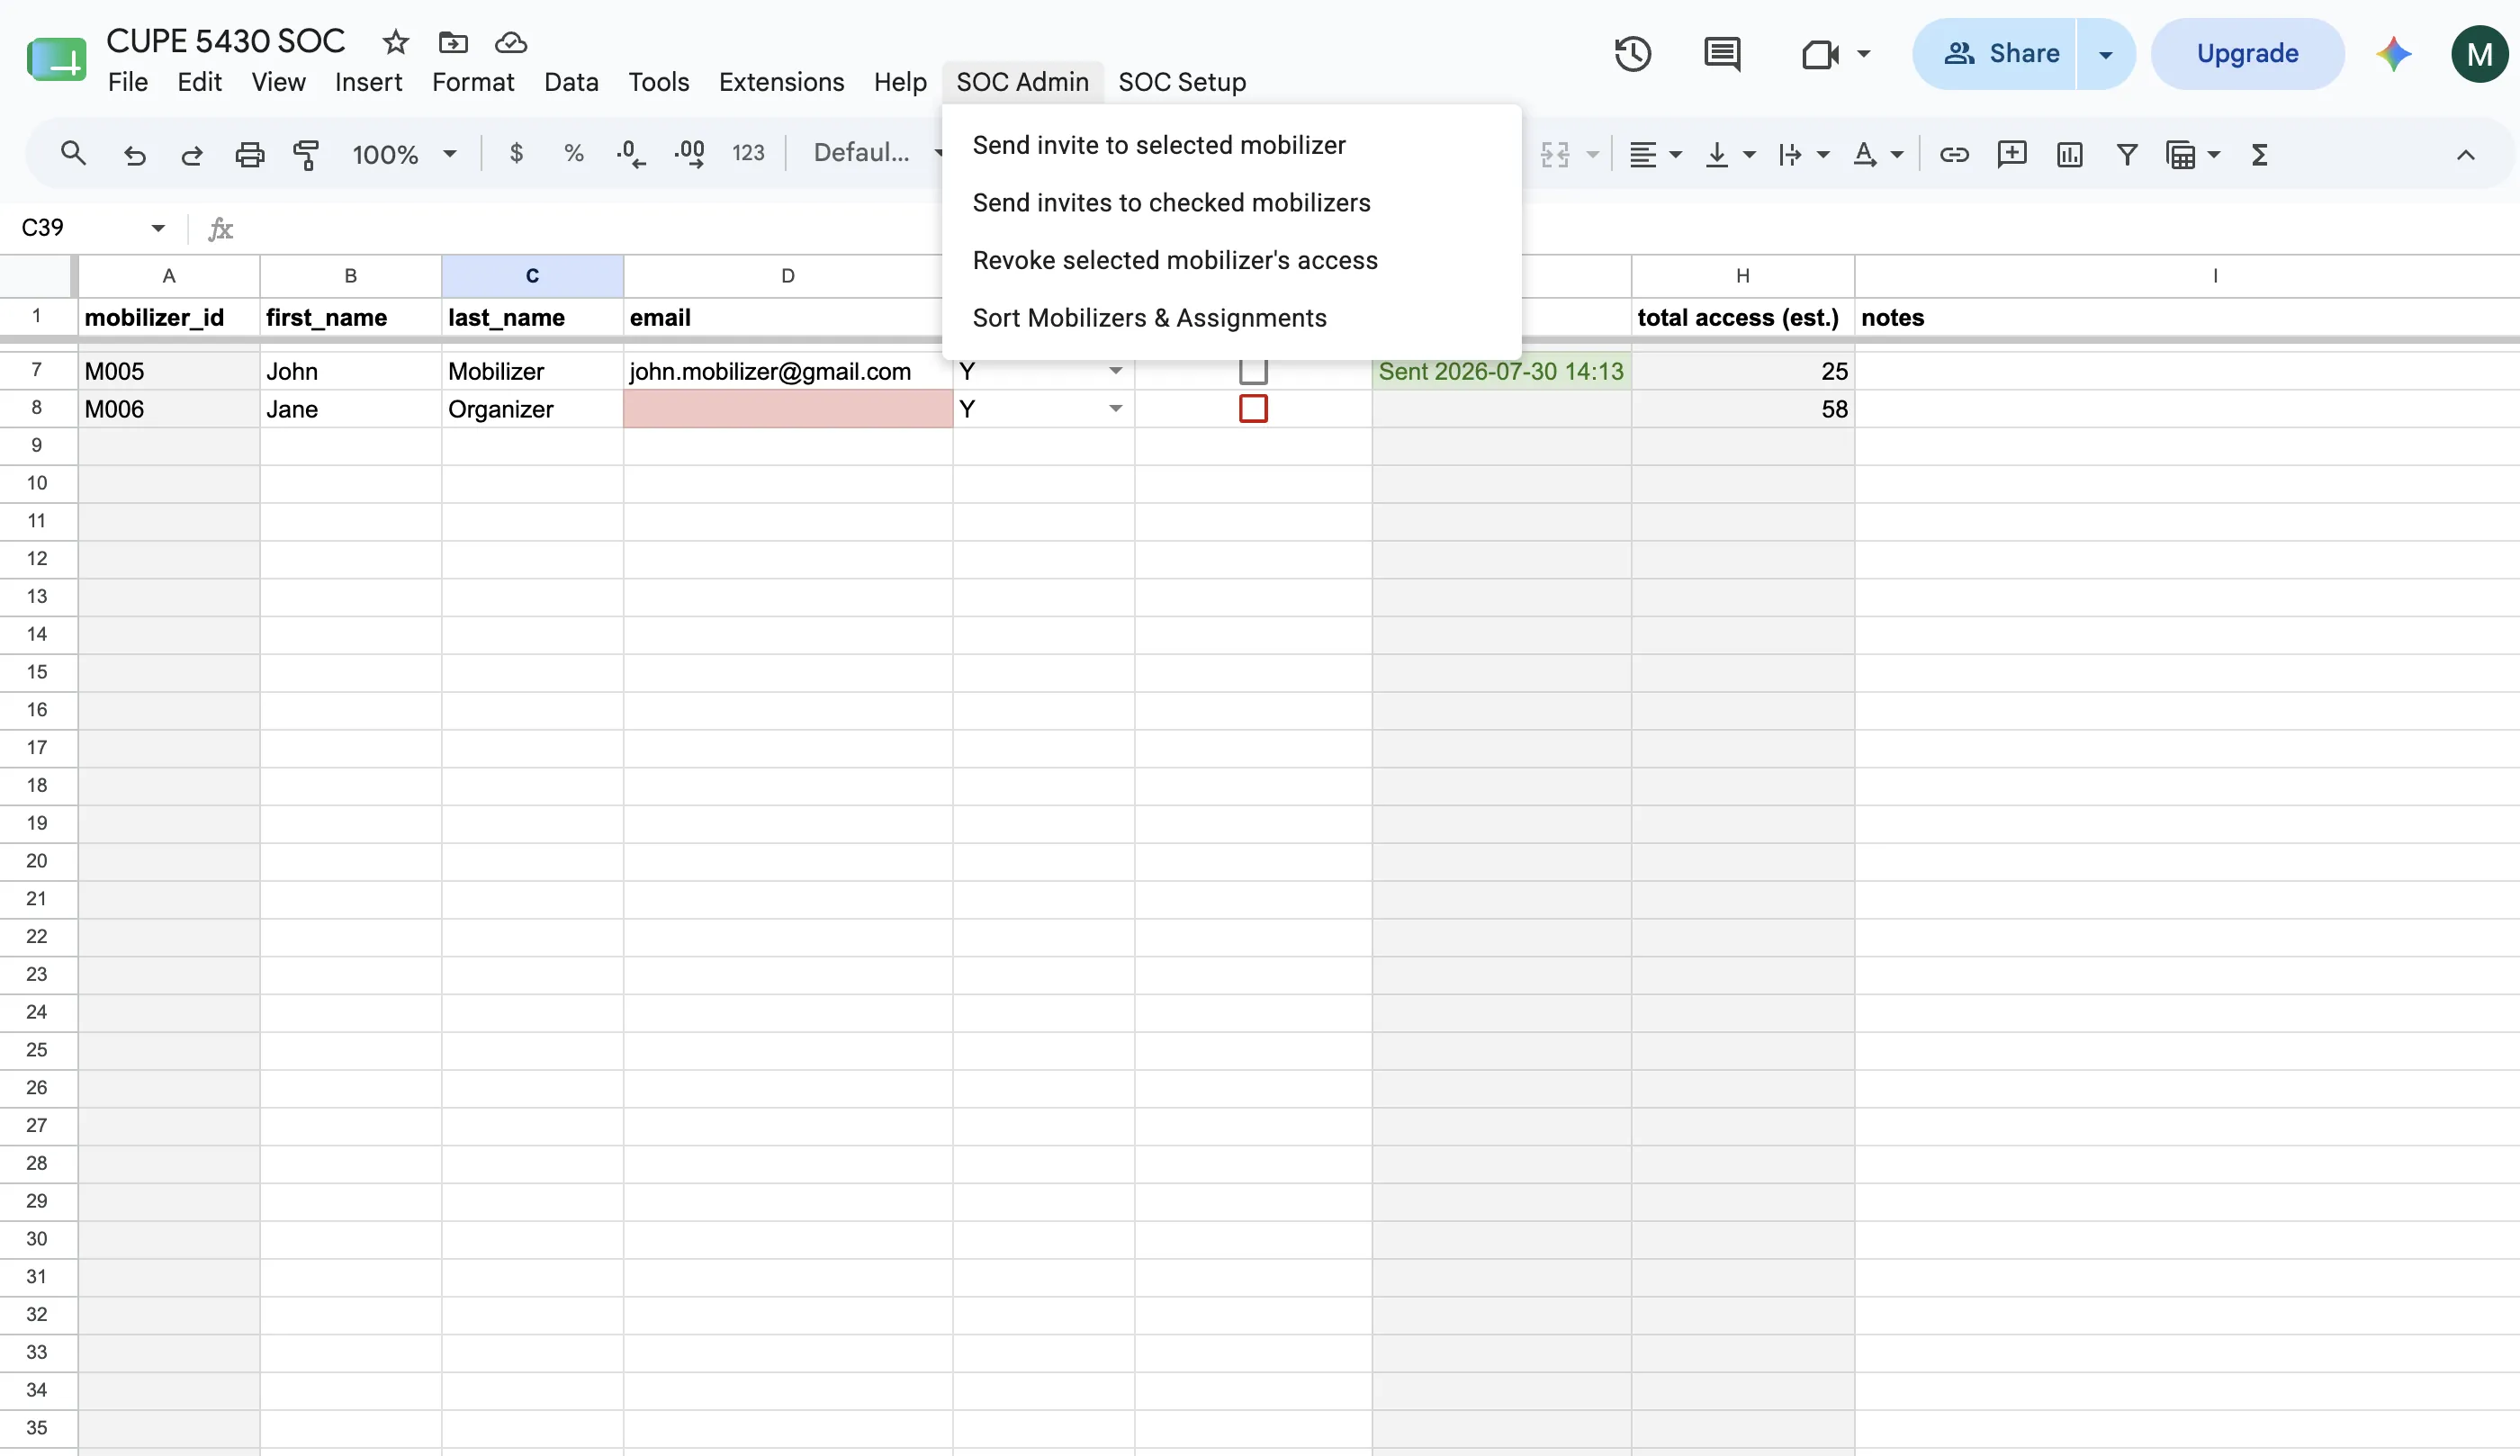
Your four day-to-day actions:
- Send invite to selected mobilizer — click anywhere on one mobilizer's row first; sends that one person their sign-in email.
- Send invites to checked mobilizers — the backstop for the checkbox: normally ticking invite sends on its own (see the Mobilizers tab), but if any boxes are sitting ticked without a sent-note — say after a failure you've since fixed — this processes them all in one go.
- Revoke selected mobilizer's access — click their row first; signs them out everywhere and stops new sign-ins. Use it when someone leaves the program or a phone goes missing. Their rows and history stay.
- Sort Mobilizers & Assignments — re-sorts both hand-edited tabs into their standard order.
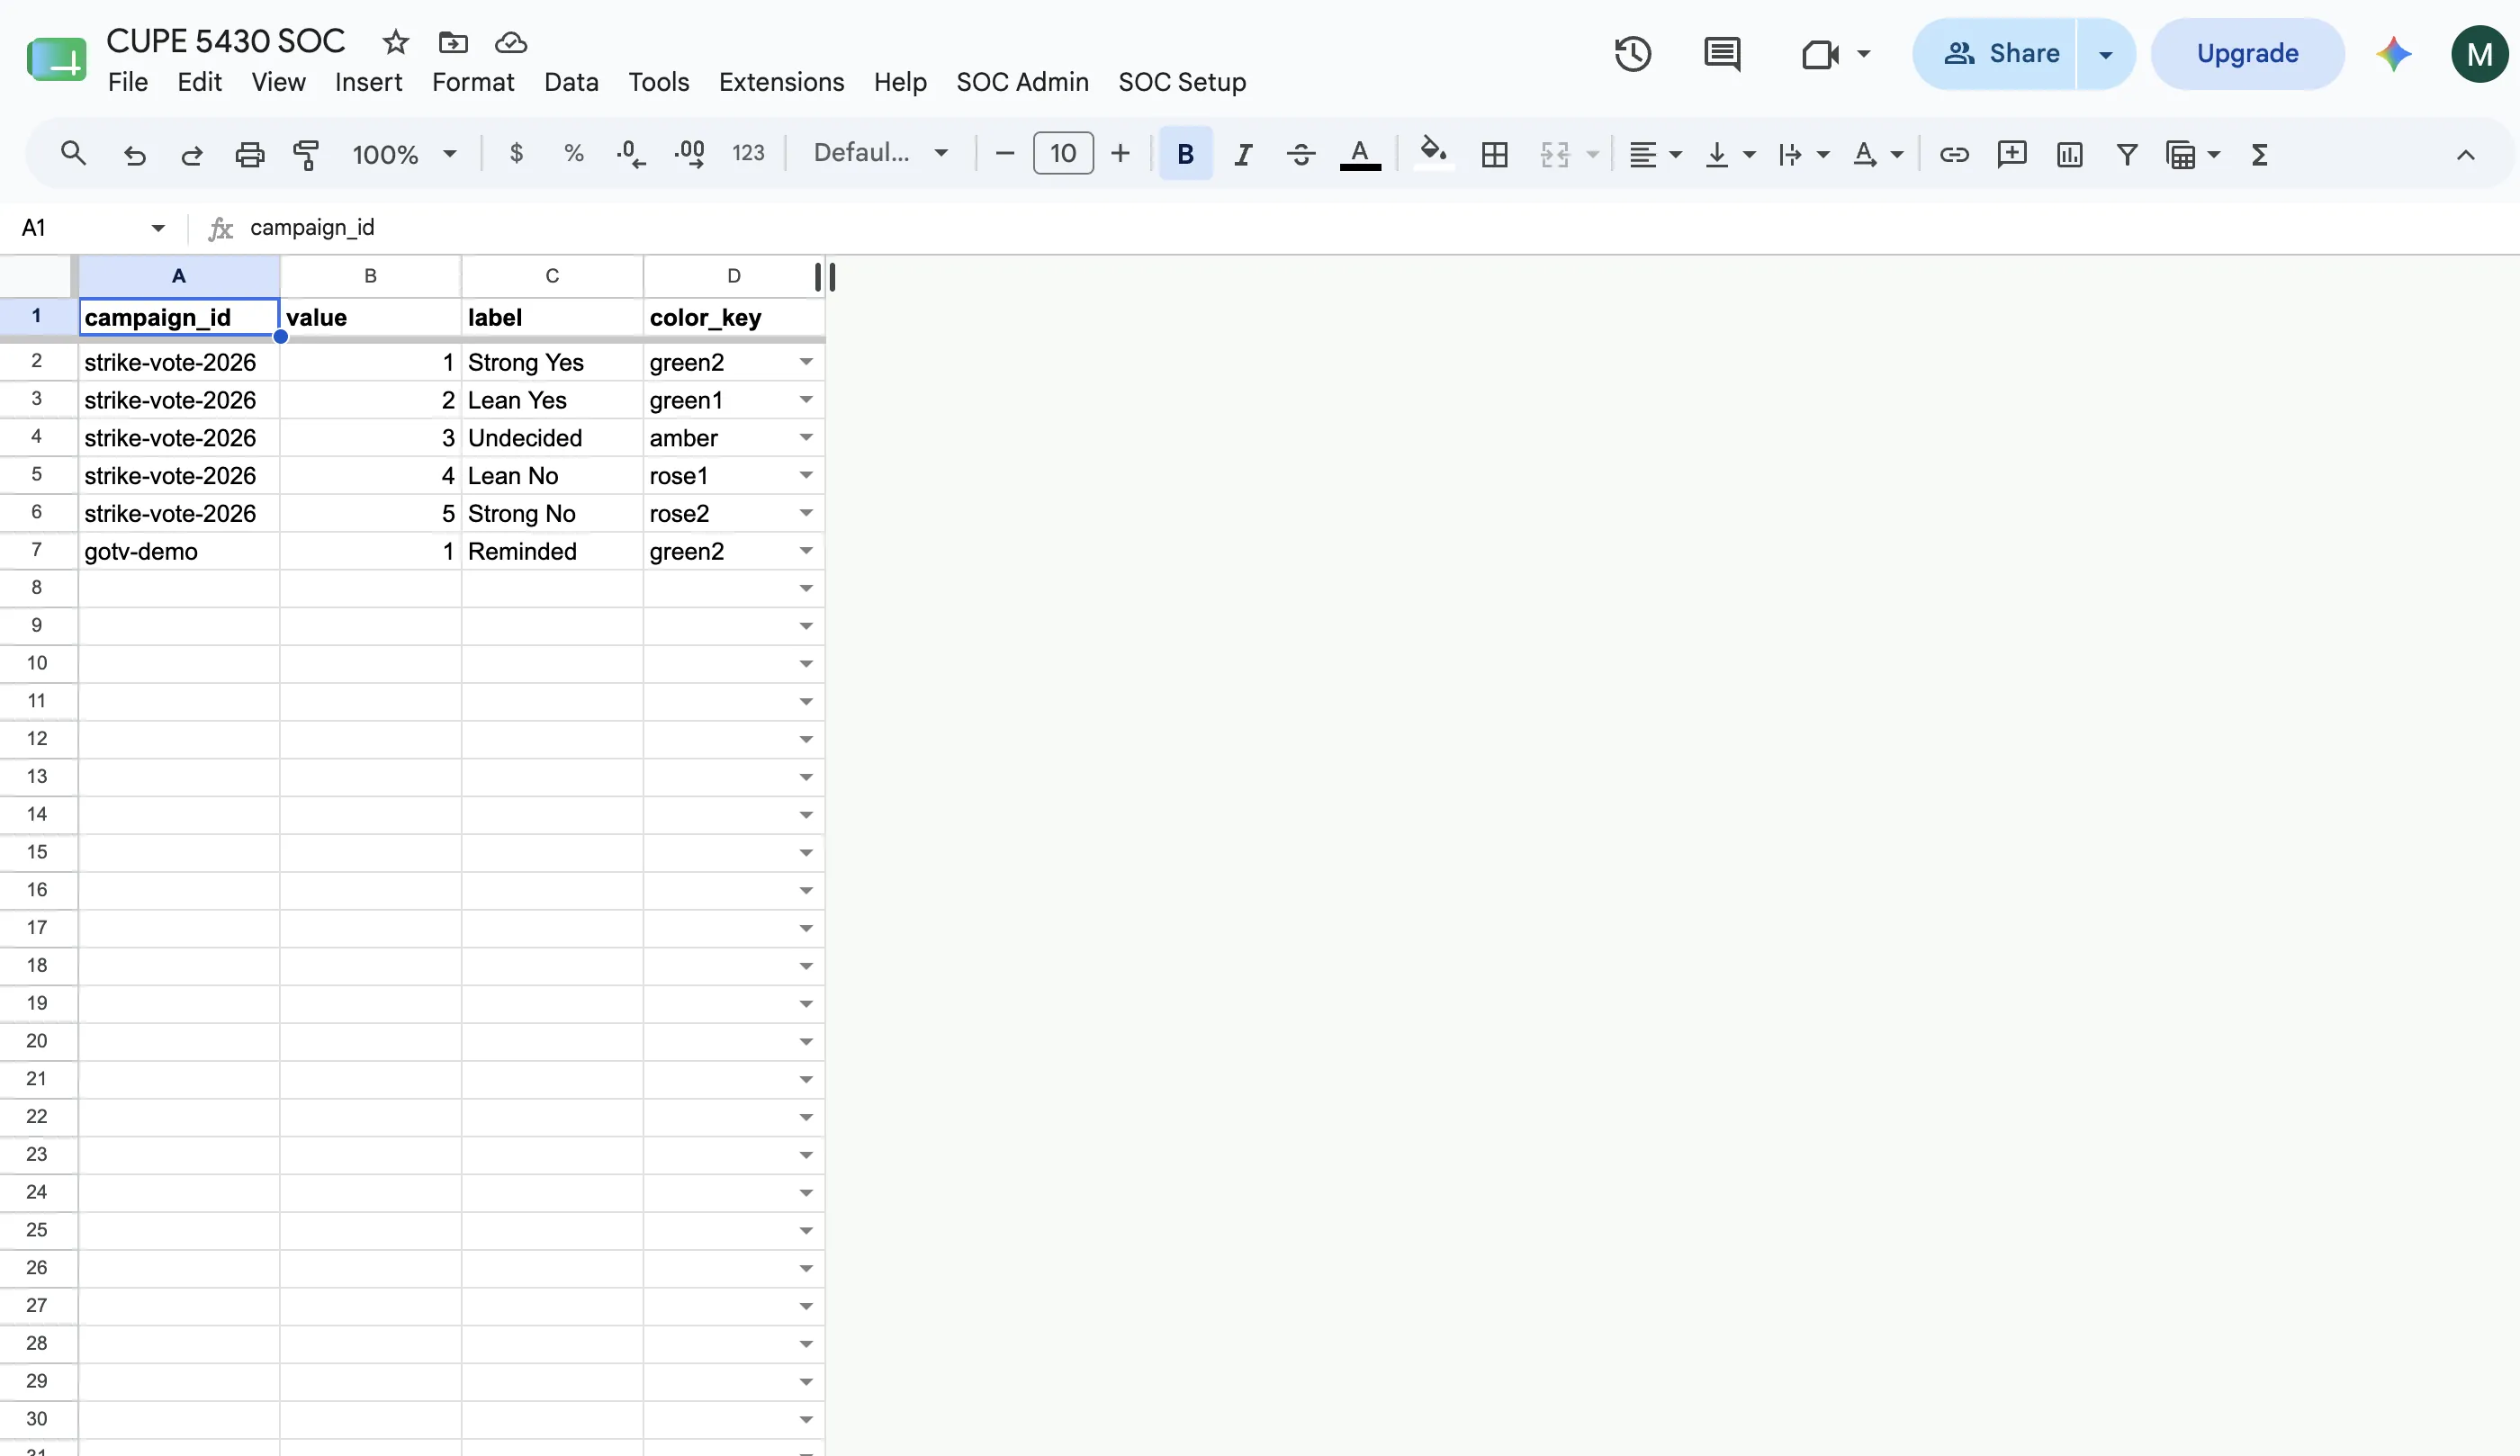
5. Reading the reports
Two tabs, both fully computed — look, don't type:
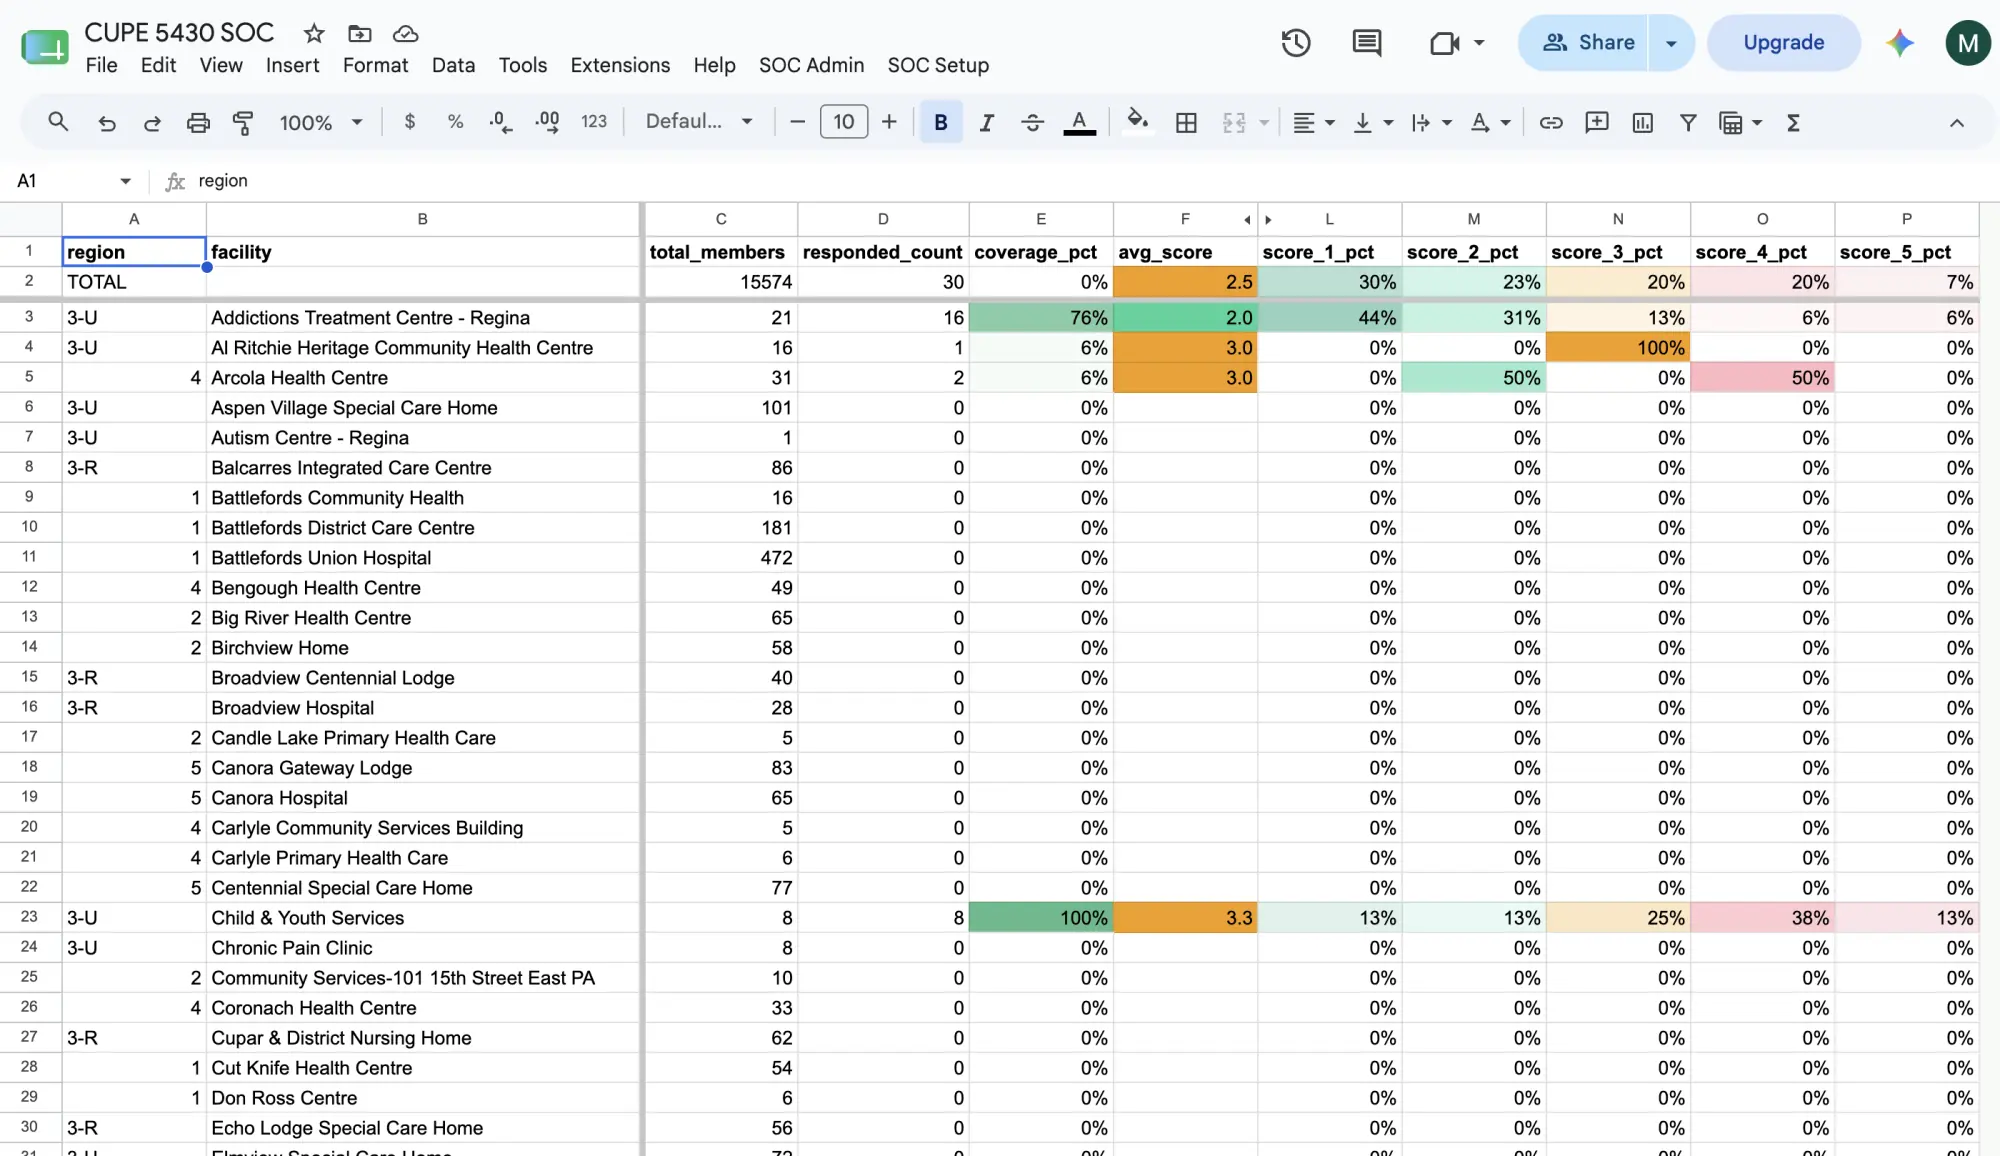
- Report_Coverage — one row per facility (grouped by region): members, responses so far, coverage %, average score, and the count and share of each answer 1–5.
- Report_Region — the same figures rolled up per region.
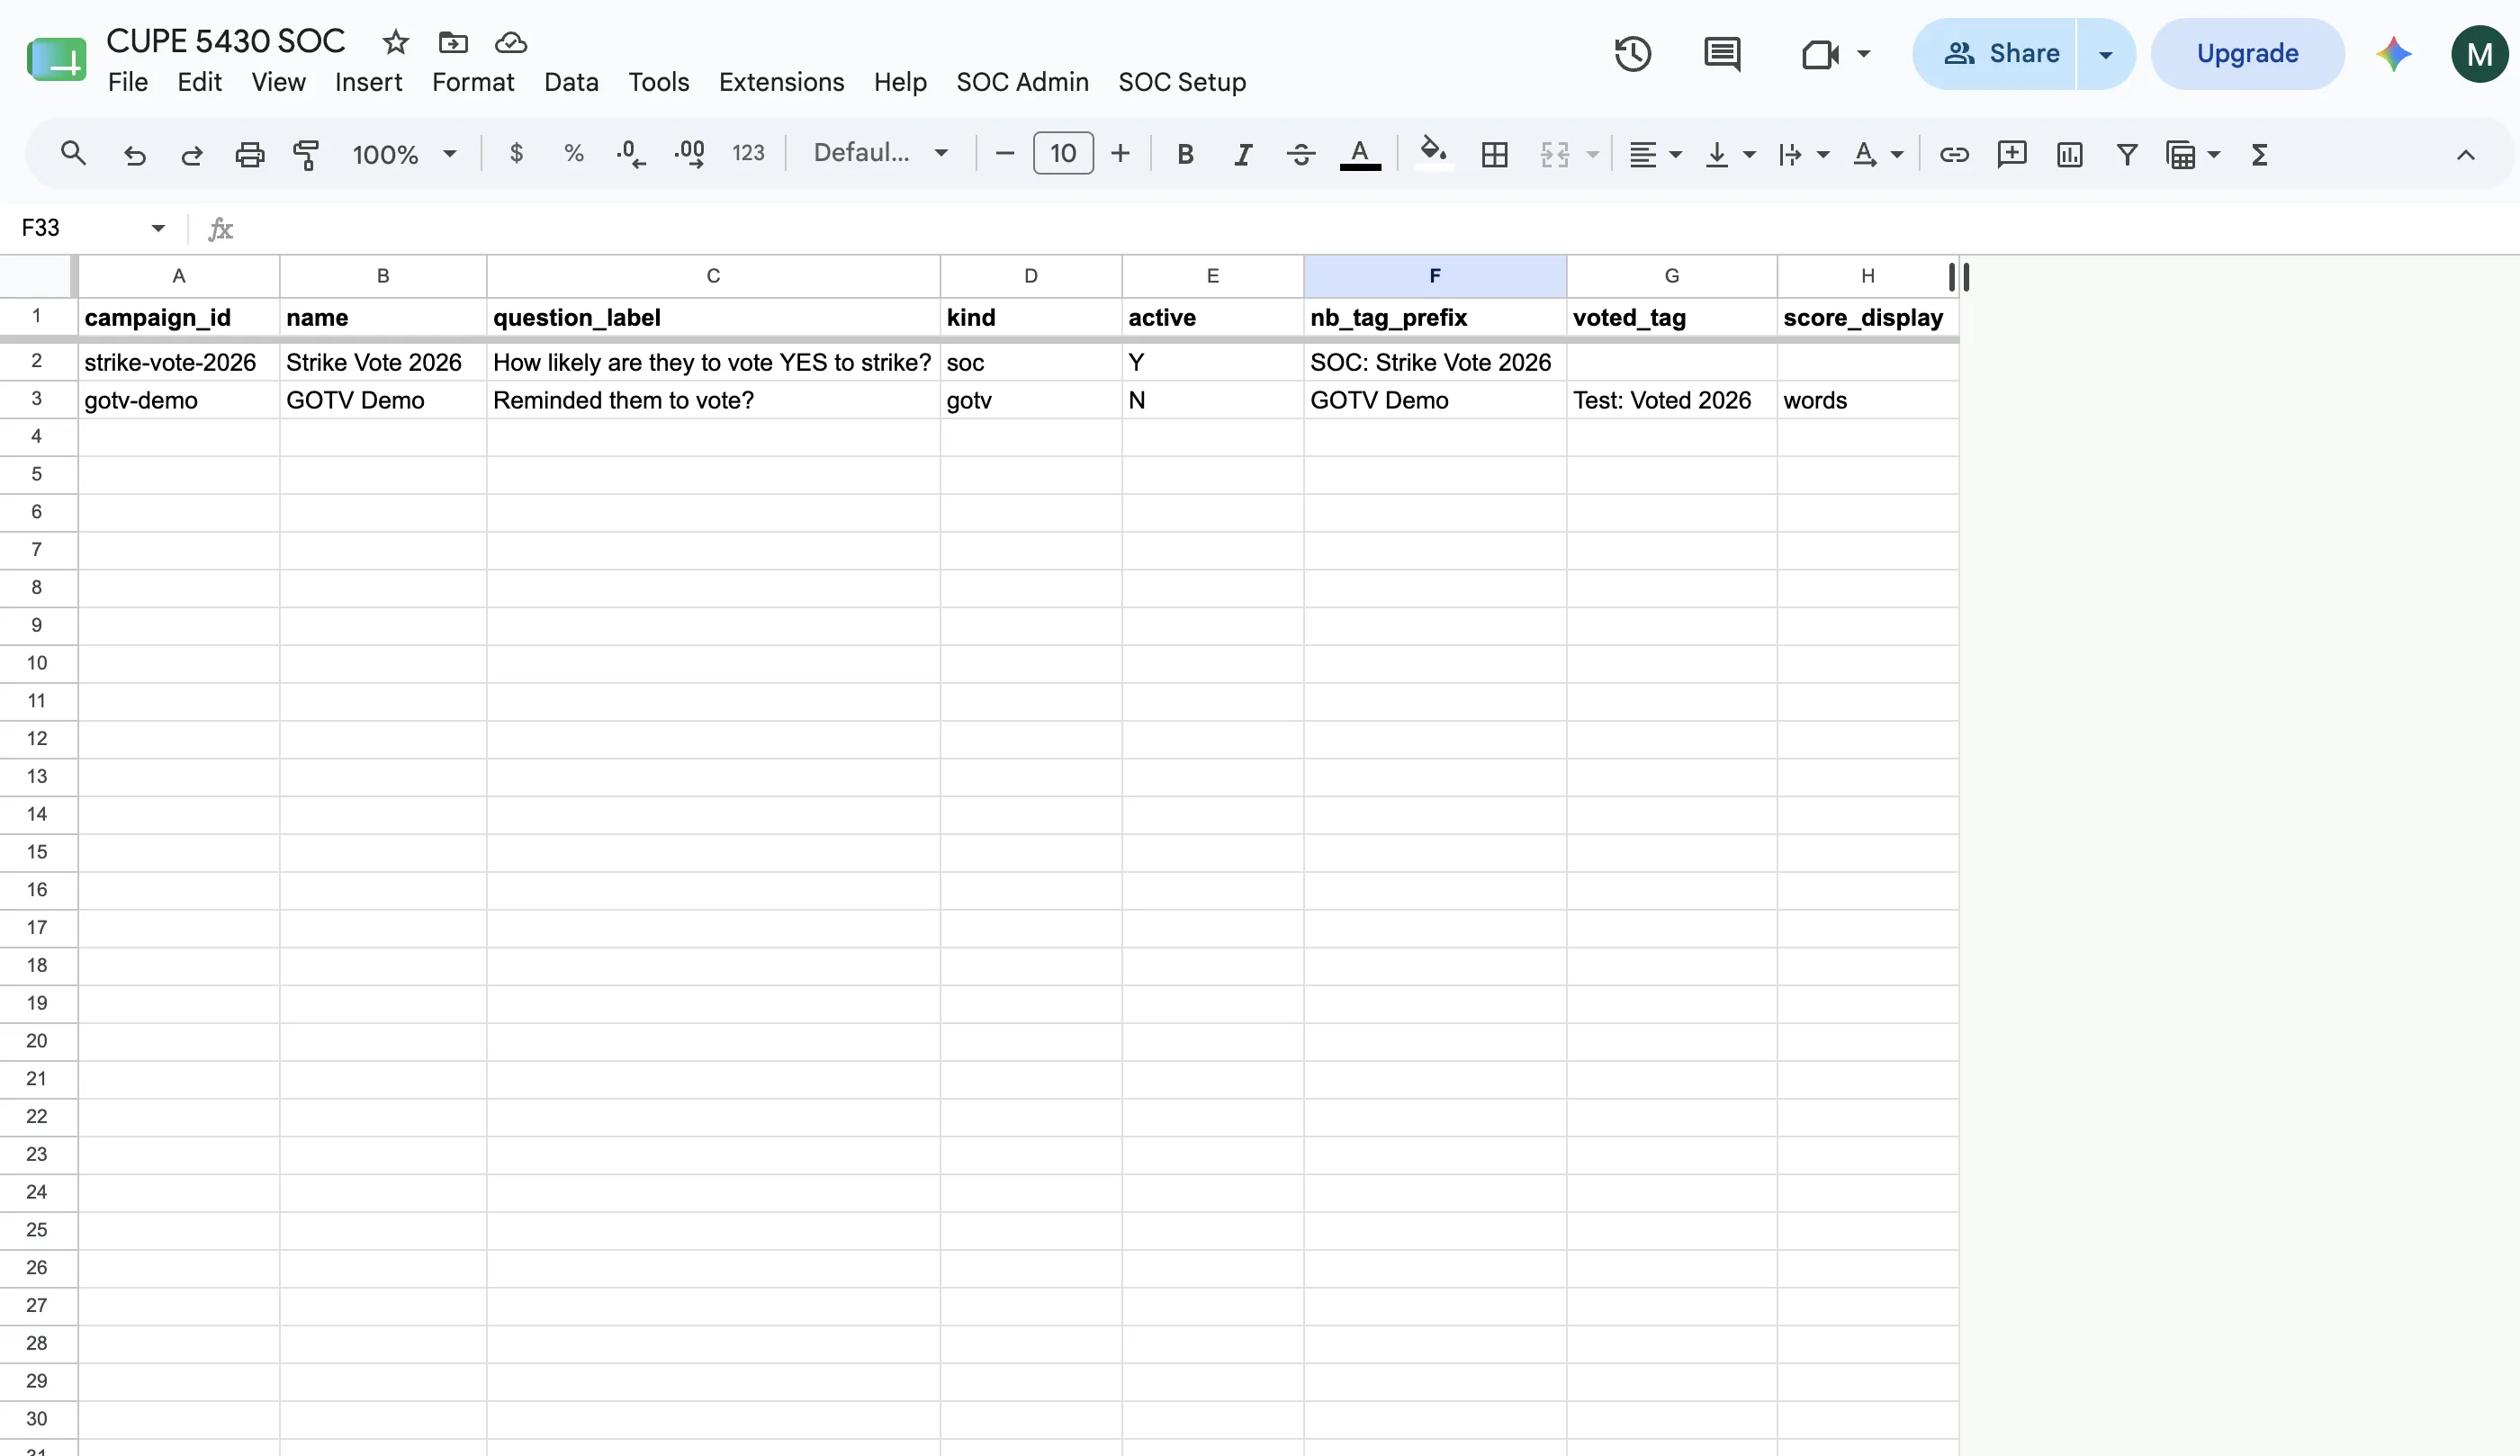
The reports always describe the currently active campaign — switch campaigns and the numbers follow. They refresh themselves; if a row looks stale, give it a few minutes before worrying.
6. Advanced: the SOC Setup menu
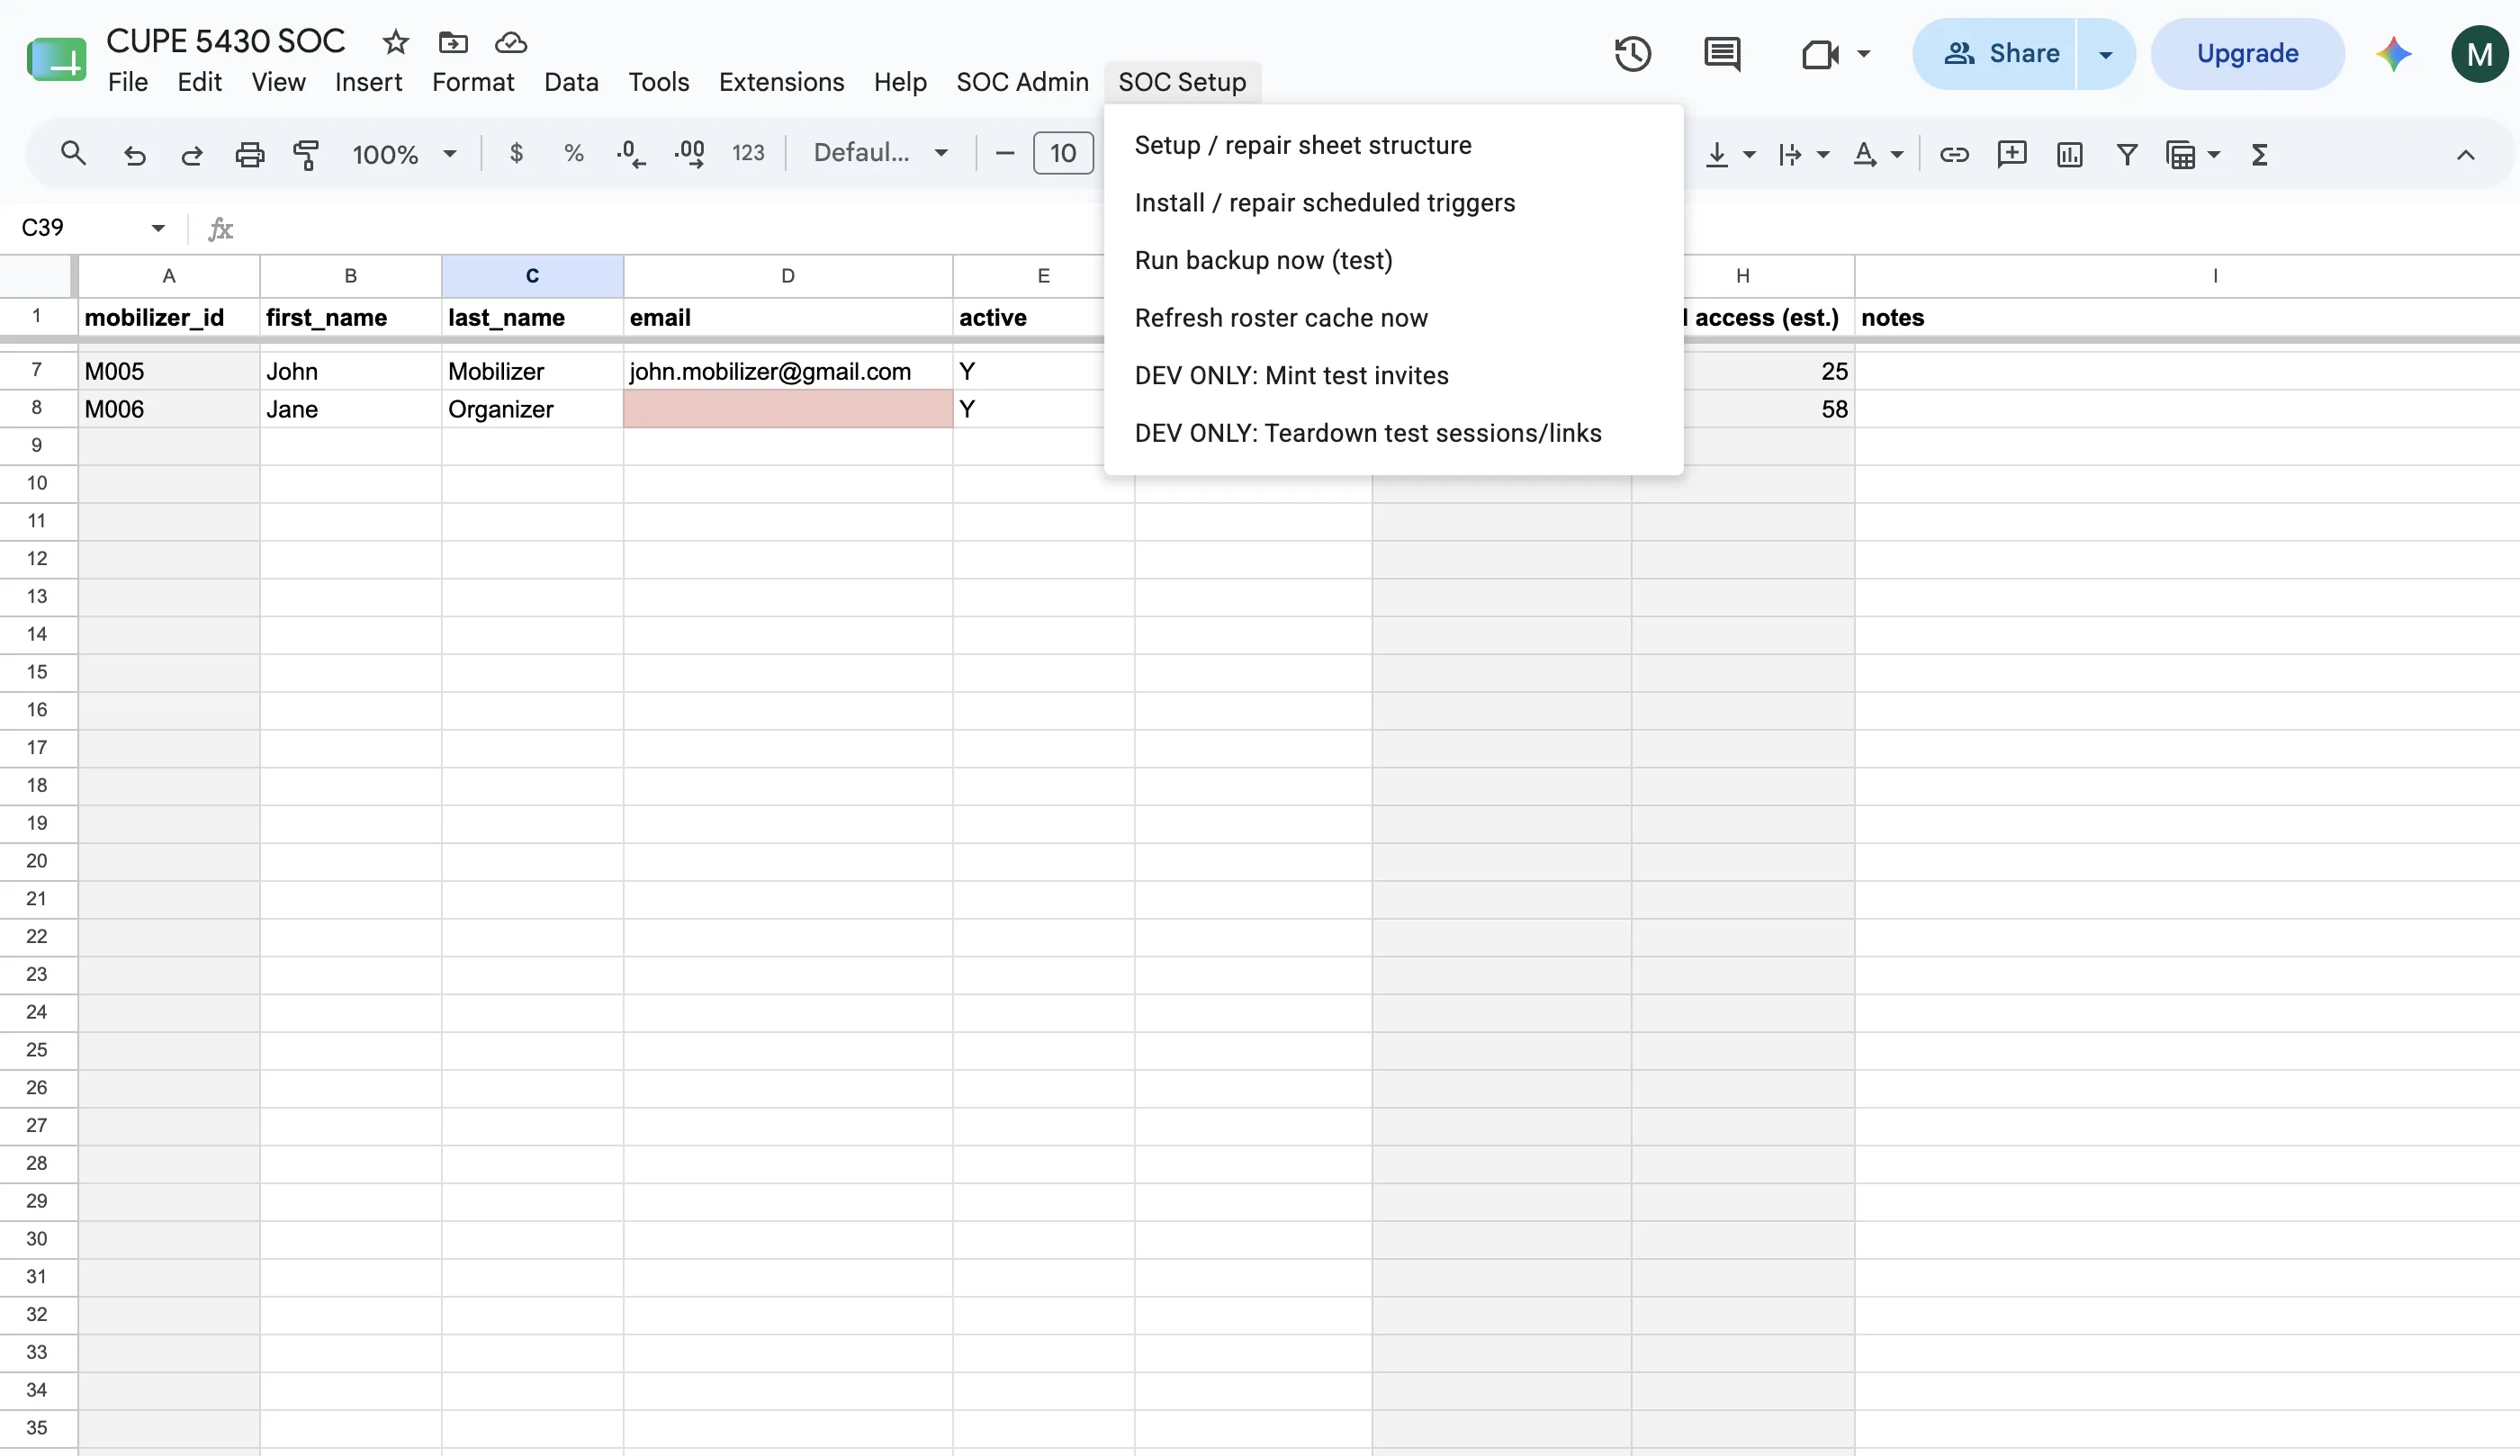
The second custom menu is the operator's — day-to-day staff work never needs it. It's documented here so you know what you're looking at (and what to leave alone):
- Setup / repair sheet structure — (re)builds the spreadsheet's tabs, columns, and dropdowns to spec. Safe to re-run; the operator runs it after platform updates.
- Install / repair scheduled triggers — re-wires the spreadsheet's scheduled jobs (nightly backup and housekeeping).
- Run backup now (test) — takes an on-demand backup of the sheet's data.
- Refresh roster cache now — pushes hand-edits to member data out to the apps immediately instead of within ~10 minutes; handy during demos and testing.
- DEV ONLY: … — two items used for testing on the development copy of the platform. On the live sheet they refuse to run; there's never a reason for staff to click them.
Questions this page doesn't answer? Ask the platform operator. Mobilizer-facing instructions live in the mobilizer guide.